Facing issues with your commercial dehumidifier? Don’t worry, we’ve got you covered. In this article, we’ll guide you on troubleshooting common problems that may arise with your commercial dehumidifiers. Whether it’s excessive noise, improper drainage, or a malfunctioning compressor, we’ll provide you with easy-to-follow steps to tackle these issues efficiently and get your dehumidifier back to optimal performance. So let’s dive in and help you troubleshoot those pesky problems with your commercial dehumidifier!
Checking Power Connection
Ensuring the dehumidifier is plugged in
The first step in troubleshooting common issues with your commercial dehumidifier is to ensure that it is properly plugged in. It may seem obvious, but sometimes the simplest solution is the most overlooked one. Check to see if the power cord is securely connected to both the dehumidifier and the power outlet.
Checking the power cord for any damage
If you have confirmed that the dehumidifier is plugged in, the next step is to carefully inspect the power cord for any signs of damage. Look for frayed wires, cuts, or exposed areas that could potentially be causing a power issue. If you notice any damage, it is important to replace the power cord to avoid any safety hazards.
Verifying the outlet is functioning properly
In some cases, the problem may not lie with the dehumidifier itself, but rather with the power outlet. To verify if the outlet is functioning properly, you can use a different electronic device, such as a lamp or phone charger, to see if it receives power. If the outlet is not working, you may need to check the circuit breaker or contact an electrician for assistance.
Using a different power source to rule out electrical issues
If you have confirmed that the dehumidifier is properly plugged in and the outlet is functioning, yet the unit still does not turn on, it may be worth trying a different power source. Plug the dehumidifier into a different outlet to see if the issue persists. This will help determine if the problem is with the dehumidifier or the original power source.
Examining Control Settings
Confirming that the dehumidifier is set to the desired humidity level
One common issue with dehumidifiers is improper control settings. Ensure that the dehumidifier is set to the desired humidity level. If the room feels excessively humid or too dry, adjust the settings accordingly until you find the optimum level.
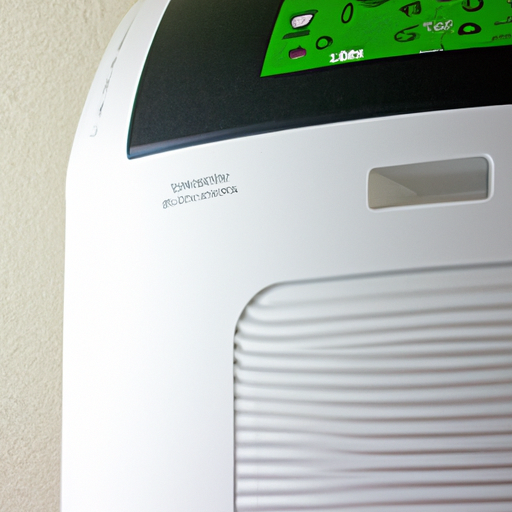
Checking if the control panel is functioning correctly
If you have confirmed the desired humidity level and the dehumidifier is still not operating as expected, it is crucial to investigate the control panel. Check for any error messages, blinking lights, or unusual behavior. If the control panel is malfunctioning, it may need to be repaired or replaced.
Resetting the settings to default and reconfiguring them
Sometimes, resetting the control settings to their default values can help troubleshoot issues. Refer to the user manual for instructions on how to reset the dehumidifier. After resetting, reconfigure the settings according to your preferences. This process can often resolve minor glitches or software-related problems.
Inspecting the Water Collection Container
Emptying the water container if it is full
Dehumidifiers remove excess moisture from the air, resulting in collected water in the container. If the dehumidifier stops working or displays an error indicating a full container, it is important to empty it. Locate and carefully remove the water collection container, then dispose of the water appropriately.
Cleaning the container to remove any debris or blockages
Over time, the water collection container may accumulate debris or blockages that can hinder its proper functioning. Check the container for any dirt, dust, or foreign objects. Clean the container thoroughly, ensuring that there are no obstructions that could impede its performance.
Ensuring the container is properly seated and not causing leakage
After cleaning the water collection container, ensure it is properly seated in the dehumidifier. Improper seating can cause leakage or prevent the dehumidifier from operating effectively. Double-check that the container is securely in place and that there are no gaps or areas where moisture could escape.
Replacing the container if it is damaged
If the water collection container is damaged, such as having cracks or holes, it is essential to replace it. A damaged container can lead to leakage, which can damage the dehumidifier or surrounding areas. Contact the manufacturer or authorized retailers to obtain a suitable replacement container.
Cleaning or Replacing the Air Filter
Locating the air filter and removing it
The air filter plays a vital role in the performance and efficiency of a dehumidifier. Over time, the filter may become clogged with dust and debris, obstructing the airflow. Locate the air filter on your dehumidifier and carefully remove it for inspection and maintenance.
Cleaning the filter with water or a vacuum cleaner
If the air filter appears dirty or clogged, it can be cleaned to restore proper functionality. Depending on the type of filter, it can be rinsed with water or gently vacuumed to remove the accumulated dust and debris. Follow the manufacturer’s instructions for proper cleaning techniques to avoid damaging the filter.
Allowing the filter to dry completely before reinstalling
After cleaning the air filter, it is crucial to allow it to dry completely before reinstalling it. Installing a wet or damp filter can negatively impact the dehumidifier’s performance and potentially lead to mold or mildew growth. Ensure that the filter is thoroughly dried, either by air drying or using a clean, dry cloth, before reinserting it into the dehumidifier.
Replacing the filter if it is damaged or too clogged to clean
In some cases, the air filter may be too damaged or excessively clogged to be effectively cleaned. If this is the case, it is recommended to replace the filter entirely. Consult the user manual or contact the manufacturer to obtain the appropriate replacement filter for your dehumidifier model.
Examining the Compressor
Listening for any unusual sounds coming from the compressor
The compressor is a vital component of a dehumidifier, responsible for the actual removal of moisture from the air. To check if the compressor is in good working condition, start by listening for any unusual sounds. Grinding, rattling, or excessively loud noises could indicate a problem with the compressor and may require professional attention.
Checking if the compressor is running or not
In addition to listening for sounds, it is essential to determine if the compressor is running or not. Typically, you can feel vibrations or heat coming from the compressor when it is operational. Carefully touch the compressor to see if it is warm, which indicates that it is functioning. If the compressor is cool to the touch, it may not be running correctly.
Inspecting the compressor for signs of damage or overheating
Physically inspecting the compressor can provide valuable insights into its condition. Look for signs of damage, such as leaks, dents, or loose connections. Additionally, an overheating compressor may indicate an issue. If the compressor feels excessively hot or emits a burning smell, it is advisable to contact a professional to diagnose and repair the problem.
Consulting a professional if there are issues with the compressor
The compressor is a complex and sensitive component of a dehumidifier, and attempting to repair it without proper knowledge or experience can be dangerous. If you suspect that the compressor is malfunctioning or experiencing issues, it is recommended to consult a qualified technician or contact the manufacturer’s customer support for guidance and assistance.
Verifying the Drainage System
Checking if the dehumidifier is properly draining the water
A functional drainage system is crucial for a dehumidifier to effectively remove excess moisture from the air. Ensure that the dehumidifier is properly draining the water it collects. If you notice water pooling around the dehumidifier or if the drainage system does not seem to be functioning, further investigation is necessary.
Inspecting the drainage hose for any clogs or obstructions
The drainage hose, responsible for carrying the collected water away from the dehumidifier, can become clogged or obstructed over time. Inspect the hose for any blockages, such as dirt, debris, or mineral deposits. Clear any obstructions to restore proper drainage.
Ensuring that the hose is properly connected and not leaking
In addition to checking for clogs, it is essential to verify that the drainage hose is properly connected to the dehumidifier. Loose or improperly connected hoses can cause leakage or prevent the water from being effectively drained. Ensure that the hose is securely attached and that there are no gaps or areas where water can escape.
Adjusting the drainage setup if necessary
If you continue to experience issues with the drainage system, it may be necessary to adjust the setup. Consider repositioning the dehumidifier or changing the angle of the drainage hose to improve the flow of water. Experiment with different configurations until you find the most efficient setup for your specific environment.
Testing the Humidity Sensor
Verifying if the humidity sensor is functioning accurately
The humidity sensor is responsible for detecting the level of moisture in the air and regulating the dehumidifier’s operation accordingly. Testing the accuracy of the humidity sensor is crucial, as an inaccurate reading can lead to inefficiencies or improper performance. Consult the user manual for instructions on how to test the humidity sensor specifically for your dehumidifier model.
Calibrating or replacing the sensor if it is not reading humidity correctly
If the humidity sensor is not functioning correctly or providing inaccurate readings, it may need to be calibrated or replaced. Consult the user manual or contact the manufacturer for guidance on calibrating the sensor. If calibration does not resolve the issue, it may be necessary to replace the sensor entirely.
Cleaning the sensor to remove any dirt or debris
Over time, dirt, dust, or debris can accumulate on the humidity sensor, affecting its accuracy. To clean the sensor, use a soft, lint-free cloth or cotton swab lightly dampened with water. Gently wipe the sensor to remove any contaminants, taking care not to apply excessive pressure or moisture.
Addressing Frost Buildup
Checking if frost is accumulating on the dehumidifier coils
Frost buildup on the dehumidifier coils can interfere with the unit’s ability to effectively remove moisture from the air. Check the coils for any signs of frost accumulation. If you notice a layer of frost on the coils, it is important to address it promptly to prevent further issues.
Allowing the dehumidifier to defrost if necessary
If frost is present on the coils, it is necessary to allow the dehumidifier to defrost completely. This typically involves turning off the unit and letting it sit for a while until the frost melts away. Avoid attempting to manually remove the frost with sharp objects or using excessive heat, as this can cause damage to the coils.
Inspecting the coils for any damage or blockages
After the dehumidifier has defrosted, inspect the coils for any damage or blockages. Look for bent fins, dirt, or debris that may be hindering the airflow. If there are any visible issues, it may be necessary to contact a professional technician to address and resolve them properly.
Contacting a technician if frost continues to build up
If frost continues to build up on the dehumidifier coils despite defrosting and inspecting them, it is advisable to contact a qualified technician or the manufacturer’s customer support for further assistance. Persistent frost buildup may indicate a more complex underlying issue that requires professional diagnosis and repair.
Troubleshooting Error Codes
Referencing the user manual for the meaning of error codes
When encountering error codes on your commercial dehumidifier, the first step is to consult the user manual. Every dehumidifier model has its own set of error codes, and the user manual provides valuable information on understanding their meaning and potential resolutions. Familiarize yourself with the error codes specific to your dehumidifier to effectively troubleshoot any issues.
Following the suggested troubleshooting steps provided
Alongside error code explanations, the user manual often includes suggested troubleshooting steps for each specific error. Follow these steps carefully, as they are designed to address the underlying issues associated with the error code you are encountering. Be patient and thorough in executing the suggested troubleshooting steps, as they can often lead to successful resolution.
Resetting the dehumidifier if the error persists
If you have followed the troubleshooting steps provided in the user manual and the error code persists, it may be worth attempting to reset the dehumidifier. This can be done by turning off the unit, unplugging it from the power source, and waiting for a few minutes before plugging it back in and turning it on again. Resetting the dehumidifier can sometimes clear temporary glitches or software-related errors.
Contacting customer support or a professional if necessary
If the issue persists despite following the user manual’s troubleshooting steps and resetting the dehumidifier, it is recommended to contact the manufacturer’s customer support for further guidance. They can provide additional troubleshooting advice or recommend contacting a professional technician who specializes in commercial dehumidifier repairs.
Regular Maintenance
Cleaning the exterior surfaces of the dehumidifier
Regularly cleaning the exterior surfaces of your commercial dehumidifier helps maintain its appearance and performance. Use a soft cloth or sponge lightly dampened with water to wipe away any dust, dirt, or grime. Avoid using abrasive cleansers or harsh chemicals, as they can damage the finish or components of the dehumidifier.
Inspecting and cleaning the fan blades
The fan blades of a dehumidifier can accumulate dust and debris, affecting their efficiency and potentially causing noise issues. Regularly inspect and clean the fan blades to ensure proper airflow. Use a soft brush or compressed air to remove any buildup, taking care not to bend or damage the blades.
Checking and tightening any loose screws or parts
Over time, vibrations and normal operation can cause screws and other parts to become loose. Periodically check the dehumidifier for any loose screws or parts and tighten them accordingly. This simple maintenance step helps prevent excessive vibrations, potential damage, and noise issues.
Inspecting the power cord for any wear or damage
The power cord of your commercial dehumidifier is subjected to regular use and can experience wear or damage over time. Regularly inspect the power cord for any signs of fraying, cuts, or exposed wires. If you notice any damage, it is important to replace the power cord promptly to avoid safety hazards.
Ensuring proper airflow around the dehumidifier
To optimize the performance of your commercial dehumidifier, it is essential to ensure proper airflow around the unit. Avoid obstructing the intake and discharge vents by keeping them clear of any objects, furniture, or walls. Adequate airflow helps the dehumidifier operate efficiently and effectively remove excess moisture from the air.
By following these troubleshooting steps and regularly maintaining your commercial dehumidifier, you can address common issues and maximize its performance and lifespan. Remember to consult the user manual for specific instructions and reach out to professional technicians or customer support when necessary.