Are you a coffee lover who craves the perfect milk froth on your cappuccinos and lattes? Look no further than your trusty stainless steel espresso machine. In this article, we will guide you through the steps on how to achieve that frothy goodness that turns an ordinary cup of Joe into a cafe-worthy masterpiece. Prepare to impress your friends and satisfy your own coffee cravings with the perfect milk froth, right from the comfort of your own kitchen.

Choosing the Right Milk
When it comes to achieving the perfect milk froth, choosing the right type of milk is crucial. There are several options available, each with its own unique characteristics that can affect the froth quality. Whole milk, 2% milk, skim milk, and non-dairy milk options are the most common choices.
Whole Milk
Whole milk is the creamiest and richest option, thanks to its higher fat content. This makes it ideal for achieving a velvety and indulgent froth. The fat in the milk adds a smoothness to the texture and gives the froth a rich flavor. If you enjoy a luxurious and full-bodied froth, whole milk is the way to go.
2% Milk
2% milk, also known as reduced-fat milk, strikes a balance between the creaminess of whole milk and the lower fat content of skim milk. It can produce a velvety froth that is slightly lighter in texture compared to whole milk. 2% milk is a popular choice for those who want a froth with a good balance of richness and lightness.
Skim Milk
Skim milk, also referred to as fat-free milk, has the lowest fat content of all the milk options. As a result, it produces a froth that is lighter and less creamy compared to whole or 2% milk. Skim milk is ideal for those who prefer a froth with a lighter texture and fewer calories.
Non-Dairy Milk Options
For those who are lactose intolerant or following a plant-based diet, non-dairy milk options can also be used to achieve a froth similar to traditional milk. Popular non-dairy milk alternatives include almond milk, soy milk, and oat milk. Each of these options has its own unique flavor profile and frothing properties, so it’s worth experimenting with different varieties to find the one that suits your taste preferences.
Preparing the Milk
Once you have chosen the type of milk you will be using, proper preparation is essential to ensure a successful frothing process.
Quantity of Milk
The quantity of milk used will depend on the size of the drink you are making. It’s important to note that milk expands when frothed, so you should only fill the frothing pitcher about halfway to leave enough room for the milk to expand and create froth. This will prevent any overflow or mess during the frothing process.
Temperature of Milk
The temperature of the milk is another crucial factor in achieving the perfect froth. For optimal results, the milk should be cold and refrigerated before frothing. Cold milk helps to create a denser and more stable foam. It’s recommended to froth the milk directly from the refrigerator for the best results.
Pouring the Milk into a Frothing Pitcher
To froth the milk effectively, it’s important to pour it into a frothing pitcher designed specifically for this purpose. The pitcher should be made of stainless steel for even heat distribution and be large enough to accommodate the desired quantity of milk. Pour the milk into the pitcher, ensuring it doesn’t exceed the halfway mark, and get ready to start frothing.
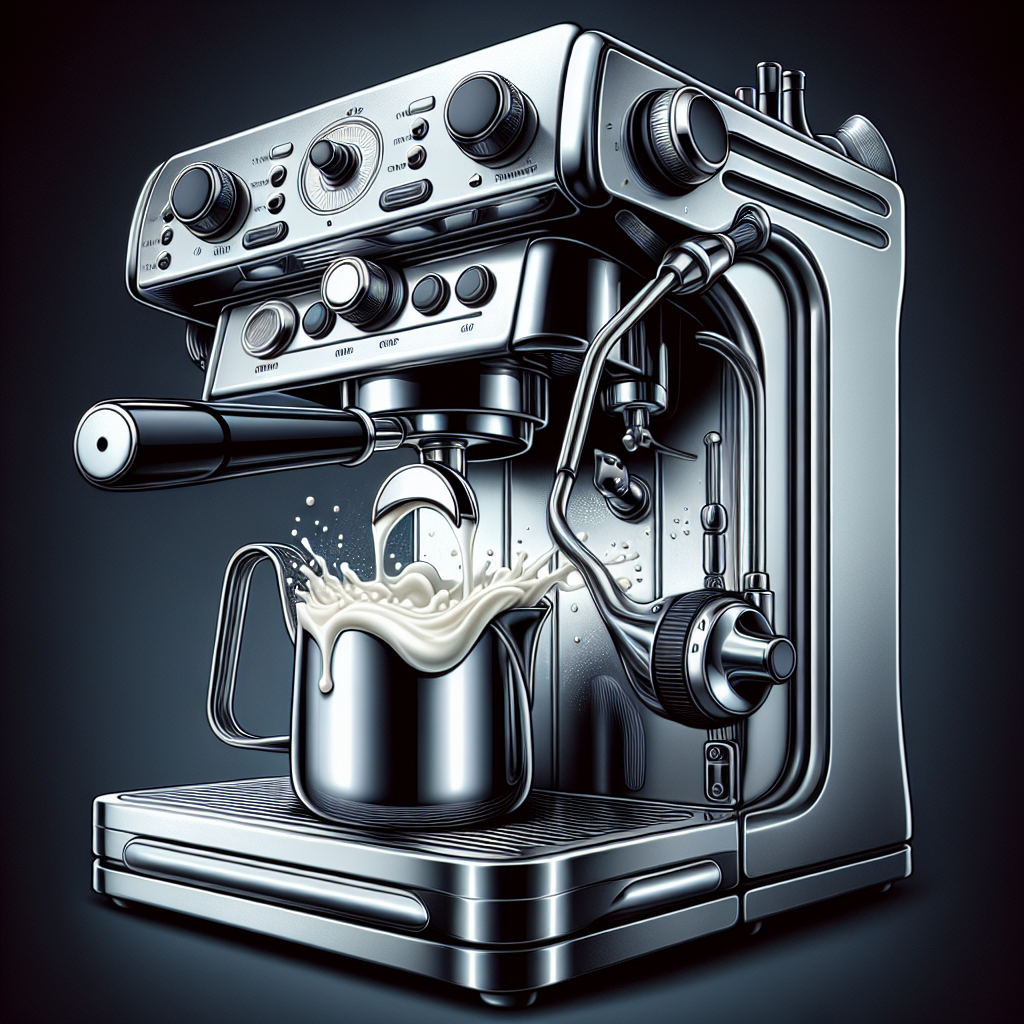
Understanding Steam Wand Techniques
The steam wand is a vital tool in the milk frothing process. Understanding how to position the steam wand, create the right steam pressure, and generate a vortex will help you achieve the perfect froth.
Position the Steam Wand
Before starting the frothing process, position the steam wand in the proper place. It should be submerged just below the surface of the milk, near the side of the frothing pitcher. This position allows the steam to create a whirlpool effect and introduce air into the milk, resulting in a creamy and frothy texture.
Creating the Right Steam Pressure
To create the perfect froth, it’s important to generate the right amount of steam pressure. This can be achieved by turning on the steam wand and allowing it to release steam for a few seconds before submerging it into the milk. This initial release of steam ensures that the wand is at the proper temperature and pressure to froth the milk effectively.
Creating a Vortex
As the steam wand is submerged in the milk, it’s essential to create a vortex by swirling the frothing pitcher in a circular motion. This motion helps evenly distribute the steam and air throughout the milk, resulting in a consistent and uniform froth. By creating a vortex, you ensure that the froth is not overly concentrated in one area and that the entire pitcher of milk is frothed evenly.
Frothing the Milk
Once the steam wand is properly positioned, it’s time to start frothing the milk. This process involves dipping the steam wand into the milk, starting the frothing process, and carefully monitoring the froth level.
Dip the Steam Wand into the Milk
With the steam wand positioned correctly and the frothing pitcher filled with the desired amount of milk, slowly dip the steam wand into the milk until the tip of the wand is just below the surface. Ideally, there should be a slight hissing sound as the steam interacts with the milk, indicating that the frothing process has begun.
Start Frothing the Milk
As the steam wand is submerged in the milk, turn on the steam and begin frothing. Move the pitcher in a circular motion while keeping the steam wand near the side of the pitcher. This motion helps incorporate air into the milk and create the desired froth consistency. Continue frothing until the desired amount of froth is achieved.
Monitoring the Froth Level
As you froth the milk, it’s important to monitor the froth level to prevent overfrothing. The froth should be thick and creamy, with tiny bubbles throughout. Avoid frothing the milk to the point where it becomes too stiff or resembles shaving cream. This can result in a less enjoyable texture and detract from the overall taste of the drink. Regularly check the froth level as you froth and stop once it reaches the desired consistency.

Achieving the Perfect Microfoam
To take your milk froth to the next level, it’s essential to achieve the perfect microfoam. Microfoam is characterized by its smooth, velvety texture and is the key to creating intricate latte art designs.
Stretching the Milk
To achieve the perfect microfoam, it’s important to stretch the milk during the frothing process. This involves moving the frothing pitcher up and down while steaming the milk. The stretching motion helps incorporate air into the milk, creating tiny bubbles that contribute to the desired microfoam texture. Be sure to control the stretching process to avoid overstretching, which can result in larger bubbles and a less smooth texture.
Creating a Whirlpool Effect
To further enhance the microfoam texture, continue swirling the frothing pitcher in a circular motion to create a whirlpool effect. This motion helps evenly distribute the microfoam throughout the milk and ensures a consistent texture. The whirlpool effect also helps enhance the creamy and velvety mouthfeel of the microfoam.
Achieving the Ideal Consistency
The ideal microfoam consistency is achieved when the milk displays a glossy, creamy appearance with a texture similar to wet paint. It should have a velvety smoothness and be free of large bubbles or visible separation between froth and milk. Achieving the perfect microfoam may take some practice, but with time and experience, you’ll be able to consistently create a texture that enhances your coffee creations.
Avoiding Common Mistakes
While frothing milk may seem intimidating at first, avoiding common mistakes can help ensure a successful frothing process and a delightful cup of coffee.
Overheating the Milk
One common mistake is overheating the milk during the frothing process. Milk should be heated to a temperature between 150°F and 160°F (65°C and 70°C). Heating it beyond this range can scorch the milk and give it a burnt taste. Be sure to monitor the milk’s temperature with a thermometer or by touch to prevent overheating.
Underfrothing the Milk
Underfrothing occurs when the milk is not frothed enough, resulting in a flat and lackluster texture. To avoid underfrothing, ensure that the steam wand is properly positioned and that you create enough steam pressure to incorporate air into the milk. Don’t be afraid to experiment with the frothing process and adjust it accordingly to achieve the desired froth consistency.
Overfrothing the Milk
On the other hand, overfrothing can lead to a froth that is too stiff and lacks the desired creamy texture. Overfrothing occurs when the milk is frothed for too long or at too high a temperature, causing the bubbles to become too large and the froth to lose its smoothness. To avoid overfrothing, regularly check the froth level and stop frothing once it reaches the desired consistency.
Experimenting with Latte Art
Once you have mastered the art of frothing milk, you can take your coffee creations to the next level by experimenting with latte art. Latte art adds an aesthetic appeal to your drinks and allows you to showcase your barista skills.
Choosing the Right Cup
The first step in creating latte art is selecting the right cup. A wide and shallow cup is recommended, as it provides enough surface area for the design to be displayed. Additionally, a cup with a curved interior allows for easier pouring and better control over the design.
Pouring Techniques
There are several popular pouring techniques used in latte art, such as the heart, tulip, and rosetta patterns. Each pattern requires a combination of pouring technique and milk frothing skills. Practice and experimentation are key in mastering these techniques. Start with simple designs and gradually progress to more complex ones as you gain confidence and skill.
Design Ideas
When it comes to latte art, the possibilities are endless. From simple heart shapes to intricate designs depicting animals or landscapes, there are numerous design ideas to explore. You can draw inspiration from online tutorials, coffee art books, or even create your own unique designs. Remember to be patient and persistent, as latte art requires practice to achieve desired results.
Cleaning and Maintaining Your Espresso Machine
Proper cleaning and maintenance of your espresso machine, particularly the steam wand, are essential for ensuring its longevity and optimal performance.
Cleaning the Steam Wand
After every use, it’s crucial to clean the steam wand to remove any milk residue. Wipe the steam wand with a damp cloth or sponge while it’s still hot to remove any milk buildup. It’s also recommended to use a designated steam wand brush or pipe cleaner to clean the inside of the wand, ensuring it remains free of clogs.
Descale your Machine Regularly
Over time, mineral deposits can accumulate inside the espresso machine, affecting its performance. To prevent this, it’s important to descale your machine regularly. Follow the manufacturer’s instructions for descaling, using a descaling solution specifically designed for espresso machines. Regular descaling helps maintain the machine’s efficiency and extends its lifespan.
Proper Storage and Maintenance
When not in use, it’s important to store your espresso machine properly to prevent damage and ensure its longevity. Turn off the machine and allow it to cool completely before covering or storing it. Store the machine in a clean and dry area, away from direct sunlight or excessive heat. Regularly check and maintain the machine’s components, such as gaskets and seals, to prevent leaks and ensure optimal performance.
Troubleshooting Frothing Issues
If you encounter issues with your milk frothing process, here are some common problems and troubleshooting steps to consider.
Milk Not Frothing Properly
If the milk is not frothing properly, it could be due to a few factors. First, ensure that the steam wand is properly positioned and submerged in the milk. Adjusting the position can help create better steam and air incorporation. Additionally, check the steam wand for any clogs or blockages that may be hindering the frothing process. If necessary, clean the steam wand thoroughly and try again.
Inconsistent Froth Texture
Inconsistent froth texture can be caused by an uneven distribution of steam or improper frothing techniques. To address this issue, ensure that you are creating a vortex by swirling the frothing pitcher in a circular motion. This helps evenly distribute the steam and air throughout the milk, resulting in a consistent texture. Additionally, practice stretching the milk and creating a whirlpool effect to enhance the overall froth consistency.
Steam Wand Not Producing Steam
If your steam wand is not producing steam, there may be an issue with the machine’s steam boiler or the wand itself. Check the machine’s manual for any troubleshooting steps specific to your espresso machine model. If the issue persists, it’s recommended to consult a professional or contact the manufacturer for further assistance.
Benefits of Using a Stainless Steel Espresso Machine
Investing in a stainless steel espresso machine offers several benefits that contribute to a better overall coffee experience.
Even Heat Distribution
Stainless steel espresso machines are known for their excellent heat distribution capabilities. This ensures that the milk is heated evenly during the frothing process, resulting in a consistent and high-quality froth. The even heat distribution also helps maintain the ideal frothing temperature, preventing overheating or underheating of the milk.
Durable and Long-lasting
Stainless steel is a durable and long-lasting material, making it an excellent choice for an espresso machine. It is resistant to corrosion, rust, and staining, ensuring that your machine remains in pristine condition even with regular use. A stainless steel espresso machine is a reliable investment that will last for years to come.
Easy to Clean
Cleaning an espresso machine is an essential part of maintaining its performance and longevity. Stainless steel surfaces are easy to clean and maintain, as they are resistant to stains and odors. Simply wipe the machine’s exterior with a cloth or sponge to keep it looking clean and polished. Additionally, stainless steel steam wands are less prone to clogging or buildup, making them easier to clean and ensuring consistent frothing performance.
In conclusion, achieving the perfect milk froth with a stainless steel espresso machine requires careful milk selection, proper preparation, understanding of steam wand techniques, and attention to frothing and microfoam techniques. By avoiding common mistakes, experimenting with latte art, and maintaining your espresso machine, you can enjoy consistently delicious and visually appealing coffee creations. Investing in a stainless steel espresso machine enhances the frothing process, providing even heat distribution, durability, and easy maintenance. So, get ready to elevate your coffee experience by mastering the art of milk frothing with a stainless steel espresso machine!