Have you ever wondered how to take your cooking skills to the next level? Look no further than your trusty stand mixer and its array of versatile attachments. In this article, we’ll explore the different stand mixer attachments and how they can help you expand your culinary skills. From kneading dough to grinding meat, these attachments are designed to make your time in the kitchen more efficient and enjoyable. So let’s dive in and discover the endless possibilities that await you with your stand mixer!
Dough Hook
Introduction to the dough hook
The dough hook attachment is a versatile tool that allows you to easily knead and mix doughs for bread, pizza, and other baked goods. It is designed to mimic the motion of hand kneading, saving you time and effort in the kitchen. Whether you are a seasoned baker or just starting out, the dough hook attachment is a must-have for any home baker.
How to use the dough hook
Using the dough hook attachment is simple and straightforward. First, ensure that your stand mixer is securely locked onto the base. Then, attach the dough hook by inserting it into the attachment hub and rotating it clockwise until it locks into place. Once the dough hook is attached, add your ingredients to the mixing bowl and start the mixer on a low speed. Gradually increase the speed as the dough begins to come together. Let the dough hook do its magic, kneading the dough until it becomes smooth and elastic.
Benefits of using the dough hook
The dough hook offers several benefits that make it an essential attachment for any home baker. Firstly, it saves you time and effort by taking care of the kneading process for you. Hand kneading can be a time-consuming and tiring task, especially when making large batches of dough. With the dough hook, you can set the mixer to do the work while you attend to other tasks in the kitchen.
Additionally, the dough hook ensures consistent results every time. It kneads the dough evenly, preventing over or under kneading that can affect the texture and rise of your baked goods. This consistency is especially important for achieving the perfect loaf of bread or pizza crust. With the dough hook, you can say goodbye to unevenly mixed doughs and hello to professional-quality results.
Recipes that can be made with the dough hook
The dough hook opens up a world of possibilities for baking enthusiasts. From classic bread and pizza dough to delicate pastries and buns, this attachment allows you to explore a wide range of recipes. Imagine fresh cinnamon rolls, fluffy focaccia, or even homemade bagels – all made effortlessly with the help of the dough hook attachment. With a little creativity and the right ingredients, the possibilities are endless.
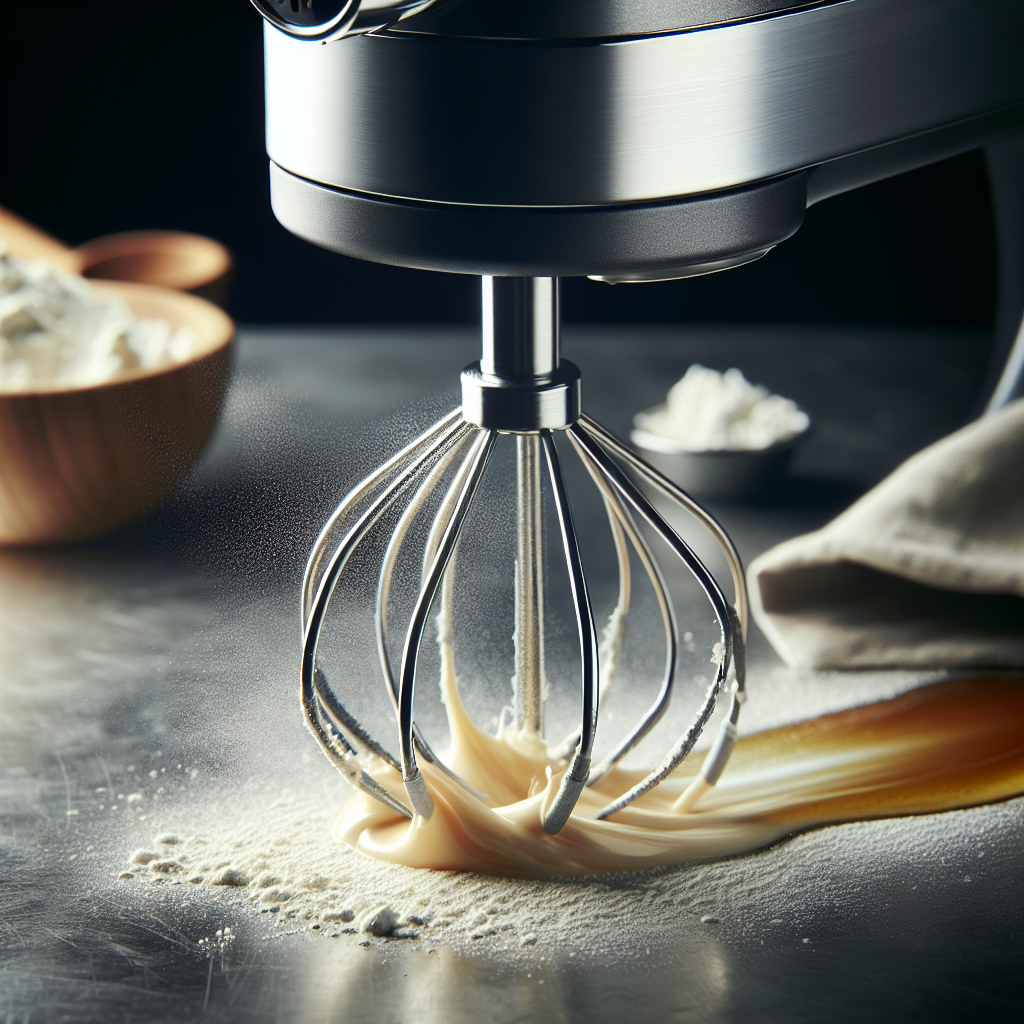
Whisk Attachment
Introduction to the whisk attachment
The whisk attachment is an invaluable tool for all your mixing and whipping needs. It is perfect for creating light and fluffy batters, whipping cream, and incorporating air into delicate mixtures. Whether you’re making meringues, frosting, or pancake batter, the whisk attachment will become your go-to tool for achieving smooth and airy results.
How to use the whisk attachment
Using the whisk attachment is a breeze. Start by attaching the whisk to the stand mixer’s attachment hub, ensuring it locks into place securely. Once the whisk is in place, add your ingredients to the mixing bowl and start the mixer on a low speed. Gradually increase the speed to your desired setting, depending on the recipe’s instructions. Allow the whisk to whip the ingredients together, creating the desired texture and incorporating air as needed.
Whisk attachment for different types of mixtures
The whisk attachment is versatile and can be used for various mixtures, ranging from thin liquids to thick batters. When whipping cream or egg whites, start with a low speed and gradually increase it to prevent splattering. For batters, such as cake or pancake batter, begin on a low speed to incorporate the dry ingredients, then increase to a medium-high speed to ensure a smooth and well-mixed batter.
Recipes that can be made with the whisk attachment
The whisk attachment opens up a world of possibilities for creating light and airy desserts. From fluffy meringues to creamy frostings, the whisk attachment helps you achieve the perfect texture for your sweet treats. Imagine indulging in a silky-smooth chocolate mousse or a velvety buttercream frosting – all made effortlessly with the whisk attachment. With its versatile nature, you’ll be amazed at the endless array of recipes you can create.
Paddle Attachment
Introduction to the paddle attachment
The paddle attachment is a multi-purpose tool designed for mixing, creaming, and beating ingredients. It is ideal for making cookie doughs, cake batters, and even mashed potatoes. The paddle attachment’s flat, wide surface ensures thorough incorporation of ingredients and even mixing without overworking the mixture.
How to use the paddle attachment
Using the paddle attachment is simple and straightforward. Start by attaching the paddle to the stand mixer’s attachment hub, ensuring it locks securely. Add the ingredients to the mixing bowl and start the mixer on a low speed to prevent splattering. Gradually increase the speed as the ingredients come together, allowing the paddle to mix everything evenly. The paddle attachment is great for creaming butter and sugar, incorporating dry ingredients into wet ones, and making smooth, well-mixed batters.
Ideal recipes for the paddle attachment
The paddle attachment is a must-have for any baking enthusiast. It is perfect for making cookie doughs, such as chocolate chip or sugar cookies, as it ensures even mixing without overworking the dough. The paddle attachment is also ideal for cake batters, ensuring the butter and sugar are creamed to perfection and the dry ingredients are incorporated evenly. Additionally, this attachment can be used for making mashed potatoes, ensuring a smooth and creamy texture.
Tips for cleaning the paddle attachment
After each use, it is essential to clean the paddle attachment thoroughly to maintain its performance and longevity. Start by unplugging the stand mixer and removing the attachment from the hub. Rinse the paddle under warm water to remove any visible residue. If needed, use a small brush or sponge to gently scrub away stubborn stains. Avoid using harsh abrasives, as they can damage the attachment’s surface. Once clean, pat the paddle dry with a cloth or let it air dry before storing.
Pasta Maker Attachment
Introduction to the pasta maker attachment
The pasta maker attachment is a game-changer for pasta lovers. It allows you to create fresh, homemade pasta in the comfort of your own kitchen. From spaghetti and fettuccine to ravioli and lasagna sheets, this attachment opens up a whole new world of pasta-making possibilities.
How to use the pasta maker attachment
Using the pasta maker attachment requires patience and practice, but the results are well worth the effort. Start by attaching the pasta maker to the stand mixer’s attachment hub, ensuring it locks into place securely. Prepare your pasta dough according to your chosen recipe. Divide the dough into manageable portions and flatten each piece with a rolling pin. Adjust the pasta maker’s settings to your desired thickness, then pass the dough through the machine.
Repeat the process, gradually decreasing the thickness setting until you achieve the desired thickness for your pasta. Once the dough is rolled out, switch to the specific pasta shape you desire, such as spaghetti or fettuccine. Pass the rolled-out dough through the corresponding cutter attachment to shape your pasta. Dust the freshly made pasta with flour to prevent sticking and cook it immediately or let it dry for future use.
Types of pasta that can be made
With the pasta maker attachment, the possibilities for homemade pasta are endless. You can create classic pasta shapes like spaghetti, fettuccine, and linguine, perfect for pairing with your favorite sauces. If you’re feeling adventurous, you can also make filled pasta, such as ravioli or tortellini, using the attachment’s included cutters. The pasta maker attachment allows you to unleash your creativity and experiment with various flavors, fillings, and shapes.
Tips for maintaining the pasta maker attachment
To keep your pasta maker attachment in excellent condition, there are a few essential maintenance tips to keep in mind. After each use, clean the attachment thoroughly, removing any dough residue or flour. Use a clean, dry cloth to ensure all parts are dry before storing. It is also recommended to apply a light coating of food-grade mineral oil to the metal parts to prevent rusting. Store the attachment in a dry and cool place, away from direct sunlight.
Meat Grinder Attachment
Introduction to the meat grinder attachment
If you’re a fan of homemade sausages, burgers, or ground meat recipes, the meat grinder attachment is a valuable addition to your kitchen arsenal. It allows you to control the quality and flavor of the meat, ensuring your dishes are made with the freshest ingredients. From grinding beef and pork to chicken and turkey, the meat grinder attachment offers endless possibilities for culinary creativity.
How to use the meat grinder attachment
Using the meat grinder attachment is simple and straightforward. Start by attaching the meat grinder to the stand mixer’s attachment hub, ensuring it locks into place securely. Ensure that the meat is trimmed of any excess fat and cut into manageable pieces. Feed the meat into the grinder, using the included food pusher to guide it through. Catch the ground meat as it comes out of the grinder and repeat the process until all the meat is ground to your desired consistency.
Different types of meats that can be ground
With the meat grinder attachment, you can grind a wide variety of meats, allowing you to take control of your recipes and create customized dishes. Whether you’re grinding beef for burgers, pork for sausages, or chicken for meatballs, the meat grinder attachment ensures a consistent and even grind every time. You can also experiment with unique flavor combinations by incorporating herbs, spices, or even vegetables into your ground meat mixtures.
Recipes that can be made with the meat grinder attachment
The meat grinder attachment opens up a world of possibilities when it comes to homemade dishes. You can create your own signature burger blends, combining different cuts of meat for a personalized flavor profile. The attachment is also perfect for making delicious sausages, allowing you to control the seasoning and ingredients for a truly customized creation. Additionally, you can use the ground meat in recipes such as meatballs, meatloaf, and even homemade gyros.
Juicer Attachment
Introduction to the juicer attachment
If you’re a fan of fresh juices packed with vitamins and nutrients, the juicer attachment is a must-have for your stand mixer. It allows you to easily extract juice from your favorite fruits and vegetables, transforming them into delicious and healthy beverages. With the juicer attachment, you can take your juicing game to the next level, enjoying homemade juices without any added preservatives or artificial flavors.
How to use the juicer attachment
Using the juicer attachment is a breeze. Start by attaching the juicer to the stand mixer’s attachment hub, ensuring it locks into place securely. Cut your fruits and vegetables into manageable pieces, removing any peels or seeds as necessary. Turn on the stand mixer and slowly feed the produce into the juicer’s chute using the included food pusher. Collect the freshly extracted juice in a container placed underneath the spout, and enjoy!
Tips for choosing the right fruits and vegetables
When using the juicer attachment, it’s essential to choose the right fruits and vegetables to ensure optimal juicing results. Select ripe produce for the best flavor and juice yield. Citrus fruits like oranges, lemons, and grapefruits are perfect for juicing, as their high acidity helps preserve the juice’s freshness. Leafy greens such as kale, spinach, and parsley can also be juiced, providing a nutrient-packed boost to your drinks. Experiment with different combinations to create unique and refreshing juice blends.
Recipes for fresh juices using the juicer attachment
With the juicer attachment, you can create a wide range of fresh and flavorful juices to suit your taste preferences. From classic orange juice and tangy lemonade to green detox juices and refreshing watermelon blends, the juicer attachment allows you to explore an array of recipes. Get creative with your combinations, incorporating fruits, vegetables, and even herbs to create unique flavor profiles. The juicer attachment opens up a world of possibilities for delicious and nutritious drinks.
Ice Cream Maker Attachment
Introduction to the ice cream maker attachment
If you’re an ice cream lover, the ice cream maker attachment is a game-changer. It allows you to create homemade ice cream, gelato, sorbets, and frozen treats with ease. Say goodbye to store-bought ice cream and hello to delicious creations made from scratch. The ice cream maker attachment ensures creamy, smooth textures and allows you to experiment with a wide variety of flavors and mix-ins.
How to use the ice cream maker attachment
Using the ice cream maker attachment requires a few simple steps. Begin by attaching the ice cream maker to the stand mixer’s attachment hub, ensuring it locks into place securely. Prior to making your ice cream base, it is recommended to chill the attachment bowl for at least 24 hours in the freezer. Once the bowl is sufficiently frozen, prepare your ice cream mixture according to your chosen recipe.
Start the stand mixer on a low speed and slowly pour the ice cream mixture into the attachment bowl. Allow the mixer to churn the mixture, incorporating air and freezing it simultaneously. The length of time needed for churning will vary depending on the recipe, so refer to your specific instructions. Once the desired consistency is reached, transfer the ice cream to a lidded container and place it in the freezer to fully set before serving.
Types of ice cream that can be made
With the ice cream maker attachment, the possibilities for frozen treats are virtually endless. From classic vanilla and rich chocolate to indulgent flavors like mint chocolate chip and cookies and cream, you can recreate all your favorite ice cream flavors. Additionally, you can experiment with unique combinations by adding mix-ins such as nuts, chocolate chunks, fruits, or even cookie dough.
Tips for achieving the perfect texture
To achieve the perfect texture when using the ice cream maker attachment, there are a few tips to keep in mind. First, ensure that the attachment bowl is thoroughly frozen before starting the churning process. This step is crucial for proper freezing and achieving a creamy consistency. It is also recommended to chill your ice cream base in the refrigerator for a few hours before churning. This helps the mixture cool down and ensures faster freezing during the churning process. Lastly, be mindful of the mixing time, as over-churning can lead to a grainy texture. Follow the recipe’s instructions for churning time and adjust as needed based on the desired consistency.
Slicer/Shredder Attachment
Introduction to the slicer/shredder attachment
The slicer/shredder attachment is a versatile tool that simplifies slicing and shredding tasks in the kitchen. It allows you to effortlessly slice vegetables for salads, shred cheese for casseroles, and even grate ingredients for toppings or garnishes. With this attachment, you can save time and achieve consistent results, whether you’re preparing meals for a family dinner or hosting a gathering.
How to use the slicer/shredder attachment
Using the slicer/shredder attachment is a breeze. Begin by attaching the slicer/shredder to the stand mixer’s attachment hub, ensuring it locks securely. Select the desired slicing or shredding blade based on your needs, and insert it into the attachment. Prepare your vegetables, cheese, or other ingredients by washing and cutting them to fit the feed tube. Flip the attachment’s lever to the desired slicing or shredding thickness, and turn on the stand mixer to the desired speed. Feed the ingredients through the feed tube using the included food pusher, and let the attachment do the work for you.
Different types of food that can be sliced/shredded
The slicer/shredder attachment is a versatile tool that can handle a wide variety of food items. It is perfect for slicing vegetables like cucumbers, carrots, and zucchini, allowing you to create uniform slices for salads or stir-fries. Additionally, it excels at shredding cheese, making meal preparation a breeze. You can even use the attachment to grate ingredients like Parmesan cheese or chocolate for toppings or garnishes. The slicer/shredder attachment helps you save time and achieve consistent results in your daily meal preparations.
Recipes that can be made with the slicer/shredder attachment
The slicer/shredder attachment opens up numerous possibilities when it comes to meal preparation. You can create colorful and vibrant salads with perfectly sliced vegetables, adding a healthy twist to your meals. Shredded cheese from the attachment is perfect for casseroles, nachos, or homemade pizzas. Additionally, you can use the attachment to grate ingredients for toppings, such as chocolate shavings for desserts or freshly grated cheese for pasta dishes. The slicer/shredder attachment allows you to effortlessly incorporate these ingredients into your recipes, making mealtime a delight.
Grain Mill Attachment
Introduction to the grain mill attachment
If you enjoy baking bread or experimenting with different types of flours, the grain mill attachment is a must-have tool. It allows you to mill your own grains, resulting in fresh and flavorful flours for your baked goods. From wheat and rye to corn and oats, the grain mill attachment opens up a whole new world of possibilities for homemade bread, pancakes, and more.
How to use the grain mill attachment
Using the grain mill attachment is a straightforward process. Start by attaching the grain mill to the stand mixer’s attachment hub, ensuring it locks into place securely. Before milling your grains, ensure they are clean and free from any debris. Pour the grains into the grain mill hopper and adjust the coarseness or fineness setting, depending on your desired result. Turn on the stand mixer and gradually increase the speed, allowing the grain mill to grind the grains into flour. Collect the freshly milled flour and store it in an airtight container for future use.
Types of grains that can be milled
With the grain mill attachment, you can mill a wide variety of grains to create your own custom flours. Common grains that can be milled include wheat, rye, oats, corn, and barley. By milling your own grains, you have control over the texture and flavor of the resulting flour, allowing you to experiment with different types of bread and baked goods. You can even mix different grains to create unique flour blends, taking your culinary creations to new heights.
Benefits of using freshly milled grains
Using freshly milled grains offers several benefits that enhance the flavor and nutritional value of your baked goods. Firstly, as the grains are milled just before use, the resulting flour retains more of its natural oils and nutrients compared to store-bought flours, which can diminish over time. This leads to a richer and more flavorful end product. Additionally, milling your own grains allows for customization, as you can control the coarseness or fineness of the flour, depending on your recipe’s requirements. Freshly milled grains also provide a sense of satisfaction, knowing that you have taken the extra step to create homemade and wholesome ingredients for your culinary creations.
Citrus Juicer Attachment
Introduction to the citrus juicer attachment
If you’re a fan of citrus-based drinks and sauces, the citrus juicer attachment is a game-changer in your kitchen. It allows you to effortlessly extract juice from citrus fruits like oranges, lemons, and limes, ensuring that every drop of juice is extracted without any seeds or pulp. With the citrus juicer attachment, you can elevate your beverages, dressings, and marinades with fresh and tangy citrus flavors.
How to use the citrus juicer attachment
Using the citrus juicer attachment is incredibly simple. Start by attaching the citrus juicer to the stand mixer’s attachment hub, ensuring it locks into place securely. Cut your citrus fruit in half, ensuring it fits properly onto the juicer cone. Turn on the stand mixer and hold the citrus fruit against the juicer cone, applying gentle pressure to extract the juice. The juice will flow down the spout into a container placed underneath, allowing you to collect every drop of tangy goodness.
Benefits of using a dedicated citrus juicer
Using a dedicated citrus juicer attachment offers several benefits compared to manually squeezing citrus fruits. Firstly, the juicer attachment ensures that every drop of juice is extracted, as the juicer cone is specifically designed to maximize juice extraction. This means no wasted juice and more efficiency in the kitchen. Additionally, the dedicated citrus juicer allows for easy and mess-free juicing, as it contains the juice within the attachment and directs it into a container. This makes it convenient for measuring and pouring, minimizing spills and messes on the countertop.
Recipes for citrus-based drinks and sauces
With the citrus juicer attachment, you can create an array of citrus-based drinks and sauces that will tantalize your taste buds. From classic lemonade and refreshing orange juice to zesty salad dressings and tangy marinades, fresh citrus flavors elevate any recipe. Experiment with different citrus fruits and try combining them for unique and refreshing concoctions. Imagine sipping on a glass of homemade limeade on a hot summer day or drizzling a flavorful lemon vinaigrette over a fresh green salad. The citrus juicer attachment allows you to channel your inner mixologist and create citrus-based delights in your own kitchen.
In conclusion, stand mixer attachments are a fantastic way to expand your culinary skills and take your cooking and baking to new heights. From kneading doughs to juicing citrus fruits, there is an attachment for every task and recipe. Whether you’re a seasoned chef or just starting out in the kitchen, these attachments make your cooking experience more enjoyable and efficient. So, unleash your creativity, experiment with new recipes, and make the most of your stand mixer’s attachments to satisfy your culinary cravings.