Imagine effortlessly creating perfectly kneaded dough without breaking a sweat. In our article, “The Science of Kneading Dough in a Stand Mixer,” we explore the fascinating process of using a stand mixer to achieve the most delectable results. From the intricate science behind gluten formation to the benefits of precise kneading, this captivating article will leave you eager to try out this culinary technique in your own kitchen. Get ready to whip up breads and pastries that will have your taste buds dancing with joy. It’s time to unlock the secrets of kneading dough in a stand mixer!
Understanding Kneading Dough
Kneading dough is an essential step in the process of baking bread, pastries, pizzas, and cookies. It involves mixing and working the dough to develop gluten, which gives the final product its structure and texture. Whether you choose to knead the dough by hand or use a stand mixer, understanding the importance of this technique and the factors that affect it is crucial in achieving excellent baking results.
Importance of Kneading Dough
Kneading dough plays a vital role in gluten development. Gluten is a protein that forms when water comes in contact with the wheat flour’s proteins known as glutenin and gliadin. These proteins combine to create an elastic network that traps the gases produced by the yeast during fermentation, resulting in a light and airy texture.
By kneading the dough, you align and stretch the gluten strands, allowing them to form a well-developed, elastic structure. This structure provides the necessary strength to hold the carbon dioxide released during fermentation and ensures a uniform and even rise of the baked goods.
Furthermore, kneading distributes the ingredients evenly throughout the dough, ensuring that the flavors are properly integrated. It also helps to break down starches, reducing the risk of a starchy or gummy texture and resulting in a more pleasant eating experience.
Kneading Dough by Hand vs. Stand Mixer
Traditionally, kneading dough by hand has been the preferred method for bakers around the world. It allows for better control over the dough’s consistency and enables you to adapt to its unique characteristics. However, in recent years, stand mixers have become increasingly popular for kneading dough, thanks to their convenience and efficiency.
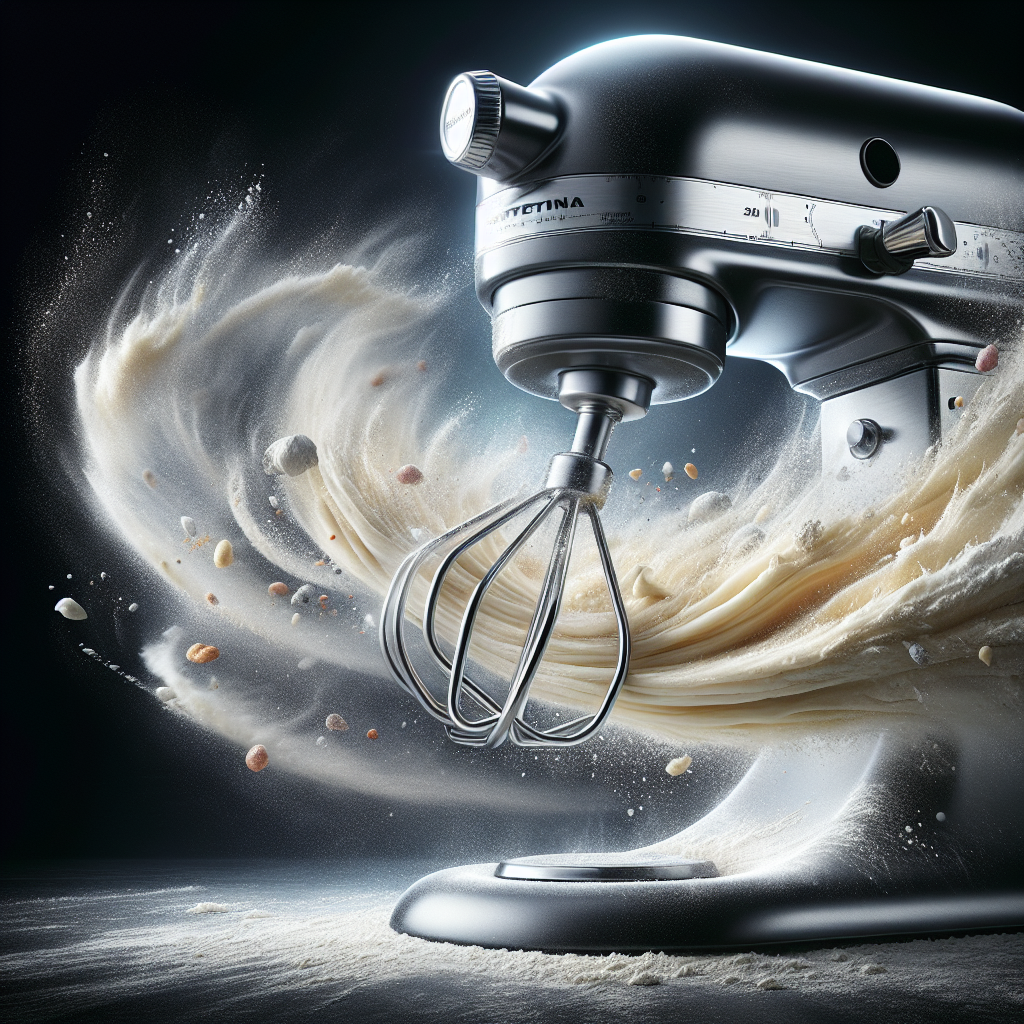
The Mechanism of a Stand Mixer
A stand mixer consists of several components that work harmoniously to knead the dough. The main parts include the motor, mixing bowl, mixing attachments (such as the flat beater, dough hook, and whisk), and various speed settings.
Components of a Stand Mixer
- Motor: The motor is the powerhouse of the stand mixer, providing the necessary energy to rotate the mixing attachments.
- Mixing Bowl: Stand mixers typically come with a large, sturdy mixing bowl made of stainless steel or glass, which can accommodate significant amounts of dough.
- Mixing Attachments: The attachments vary depending on the desired mixing action. The flat beater is ideal for creaming butter and sugar, while the dough hook is specifically designed for kneading dough. The whisk attachment is used for whipping cream and egg whites.
- Speed Settings: Stand mixers offer multiple speed settings, allowing you to adjust the mixing speed based on the recipe’s requirements.
Working Principle of a Stand Mixer
When kneading dough with a stand mixer, the dough hook attachment is typically used. The hook’s spiral-shaped design mimics the motion of kneading by hand, creating friction and stretching the gluten strands. As the mixer rotates, the dough hook pushes the dough against the sides of the mixing bowl, effectively kneading it.
The benefit of using a stand mixer lies in its ability to knead the dough consistently and efficiently. The motor’s power and the steady rotation of the dough hook ensure that the dough is kneaded evenly, without the risk of overworking or underworking it.
Factors Affecting Dough Kneading
Several factors can influence the kneading process and ultimately impact the quality of the final baked goods. It is crucial to understand how each of these factors interacts with the dough to achieve optimal results.
Flour Type and Gluten Content
The type of flour used and its gluten content significantly affect the kneading process. Different flours have varying protein levels, which directly influence gluten formation. Bread flour, for example, has a higher protein content than all-purpose flour, resulting in a stronger gluten network.
Water Content
The amount of water added to the dough also plays a critical role. Water hydrates the flour’s proteins, allowing them to form gluten. Achieving the right water content is essential for optimal gluten development. Too little water can lead to a dry and crumbly dough, while too much water can result in a sticky and difficult-to-handle dough.
Kneading Speed and Duration
The speed and duration of kneading determine the strength and elasticity of the gluten network. Kneading at higher speeds can lead to more gluten development, while longer kneading times allow for better distribution of ingredients and more thorough gluten formation.
Temperature
Dough temperature affects the fermentation process and, consequently, the gluten development. Warmer temperatures accelerate fermentation, leading to faster gluten formation. However, excessive heat can also affect the dough’s stability and may result in over-fermentation.
Benefits of Using a Stand Mixer for Kneading Dough
While kneading dough by hand offers a tactile and traditional approach, utilizing a stand mixer presents numerous advantages that can enhance your baking experience.
Consistency and Efficiency
One of the significant benefits of a stand mixer is the consistency it provides in kneading the dough. The constant rotation of the dough hook ensures that the dough is evenly mixed and kneaded, reducing the risk of uneven gluten development. This consistency leads to consistent baking results, with uniform texture and rise.
Additionally, stand mixers allow you to multitask in the kitchen. While the dough is being kneaded, you can prepare other ingredients or attend to other cooking tasks. This efficiency saves time and enables you to be more productive in the kitchen.
Time and Effort Saving
Kneading dough by hand requires physical effort and can be time-consuming. By using a stand mixer, you can save yourself from the laborious task of manually kneading the dough. The motor’s power and the dough hook’s design make the kneading process effortless and quick, allowing you to enjoy the benefits of homemade baked goods without the strenuous work.
Hands-free Mixing
Using a stand mixer for kneading dough provides a hands-free mixing experience, freeing you up to focus on other aspects of the baking process. You can easily monitor the dough’s progress, add ingredients, and adjust the mixing speed without having to actively knead the dough yourself. This convenience allows for a more relaxed and enjoyable baking experience.
Understanding Gluten Development
Gluten development is crucial in achieving desirable baking results. By understanding the process of gluten formation and the role of kneading, you can optimize your dough preparation techniques.
Gluten Formation
Gluten formation begins when water comes in contact with the proteins in wheat flour, glutenin, and gliadin. As the proteins combine, they form a network of interconnected strands that provide structure and elasticity to the dough. The kneading process helps align and stretch these gluten strands, resulting in a well-developed network.
Role of Kneading in Gluten Development
Kneading dough facilitates gluten development in multiple ways. Firstly, it mixes and hydrates the ingredients thoroughly, ensuring that the proteins have ample opportunity to come in contact with water. Secondly, kneading encourages the alignment and stretching of gluten strands, allowing them to entrap the gases released during fermentation and create a light, airy texture. Lastly, the mechanical action of kneading helps break down starches, resulting in improved texture and flavor.
Ideal Mixing Techniques for Different Doughs
Different types of dough require specific mixing techniques to achieve optimal results. Here are the ideal mixing techniques for some common doughs:
Bread Dough
Bread dough typically requires thorough kneading to develop a strong gluten network. The dough should be kneaded until it reaches a smooth and elastic consistency. This process can take around 10 to 15 minutes with a stand mixer. The dough should pass the “windowpane test,” where a small piece of dough can be stretched thin without breaking.
Pastry Dough
Pastry dough, such as for pie crusts or croissants, requires a gentler approach compared to bread dough. Over-kneading can cause the dough to become tough and lose its delicate, flaky texture. Mix the ingredients until they come together, and then gently shape the dough without excessive kneading.
Pizza Dough
Pizza dough is typically a hybrid between bread and pastry dough. It benefits from moderate kneading to develop gluten strength while preserving some flexibility. Knead the dough until it reaches a smooth and elastic consistency, which usually takes around 8 to 10 minutes.
Cookie Dough
Cookie dough often requires minimal to no kneading. Overmixing can lead to cookies with a tougher texture. Mix the ingredients until they are combined and the dough comes together. Be sure to avoid overworking the dough to maintain a tender and crumbly texture.
Common Mistakes to Avoid
While kneading dough, it is essential to be mindful of common mistakes that can affect the quality of the final product. By avoiding these pitfalls, you can ensure better baking results.
Overmixing the Dough
Overmixing the dough, especially with a stand mixer, can lead to excessive gluten development. This can result in a tough and dense final product. Pay attention to the dough’s consistency and stop kneading once it reaches the desired texture.
Undermixing the Dough
On the other hand, undermixing the dough can result in a poorly developed gluten network. This can lead to a dense and crumbly texture. Ensure that all the ingredients are well combined and the dough is uniformly mixed before proceeding with any baking steps.
Insufficient Resting Time
After kneading the dough, it is crucial to allow it to rest. Resting allows the gluten strands to relax, making the dough easier to shape and manipulate. Skipping this step can result in a dough that is difficult to handle and shape, and may also affect the final texture.
Using Incorrect Mixing Attachments
Using the wrong mixing attachment for the dough can yield subpar results. Be sure to select the appropriate attachment for the type of dough you are working with. The dough hook is specifically designed for bread dough, while the flat beater is suitable for lighter mixtures such as cake batter or cookie dough.
Troubleshooting Kneading Issues
Sometimes, despite your best efforts, issues may arise during the kneading process. Here are a few common kneading issues and how to troubleshoot them:
Sticky Dough
If the dough is too sticky, it may be due to excessive water content. Add small amounts of flour gradually until the dough reaches a workable consistency. If the dough is still sticky after adding more flour, it may require additional kneading time to develop the gluten further.
Dry and Crumbly Dough
A dry and crumbly dough may be a result of insufficient water or over-kneading. Begin by adding small amounts of water gradually, allowing the dough to hydrate. If the dough remains dry after adding water, it may require additional kneading to develop the gluten further and create a more cohesive dough.
Uneven Mixing
If the dough is not mixing evenly or is not properly incorporating the ingredients, stop the mixer and scrape down the sides of the mixing bowl. Ensure all ingredients are evenly distributed before continuing to knead. If the issue persists, it may be necessary to adjust the mixing speed or duration.
Tips and Techniques for Successful Dough Kneading
To achieve optimal results when kneading dough, consider the following tips and techniques:
Choosing the Right Mixing Speed
Selecting the appropriate mixing speed is crucial in achieving the desired gluten development. Higher speeds can lead to more gluten formation, while lower speeds can provide gentler mixing. Experiment with different speeds based on the recipe and the desired outcome.
Getting the Right Dough Consistency
Monitoring the dough’s consistency and texture throughout the kneading process is essential. The ideal dough consistency should be smooth, elastic, and slightly tacky. It should easily pull away from the sides of the mixing bowl without sticking excessively. Adjust the water or flour amounts as necessary to achieve the desired dough consistency.
Monitoring the Dough’s Progress
While the stand mixer does the heavy lifting, it is crucial to keep an eye on the dough’s progress. Watch for changes in texture, consistency, and appearance. This visual assessment helps determine when the dough is adequately kneaded and when to proceed with the next steps in the recipe.
Adjusting the Mixing Time
The mixing time can vary depending on the dough’s characteristics and the desired results. While most recipes provide a guideline for the recommended kneading time, it is important to be flexible and adjust as needed. Be mindful of the dough’s consistency and keep in mind that it is better to slightly under-knead than to over-knead.
Exploring Additional Features of Stand Mixers
Aside from their primary function of kneading dough, stand mixers offer additional features that can enhance your baking experience.
Dough Hook Attachment
The dough hook attachment is specifically designed for kneading yeast dough. Its spiral shape allows for efficient gluten development while minimizing the risk of overworking the dough. This attachment can handle substantial amounts of dough, making it ideal for bread baking and other yeast-based recipes.
Planetary Mixing Action
Stand mixers utilize a planetary mixing action, which refers to the attachment’s movement around the mixing bowl while also spinning on its own axis. This action ensures that the ingredients are mixed thoroughly and evenly, resulting in consistent baking results.
Tilt-Head vs. Bowl-Lift Stand Mixers
Stand mixers come in two main designs: tilt-head and bowl-lift models. Tilt-head mixers have a head that tilts back, allowing for easy access to the mixing bowl. Bowl-lift mixers, on the other hand, have a lever that raises and lowers the bowl. Consider the size of your kitchen and your preferred style of use when choosing between these options.
In conclusion, understanding the science and technique behind kneading dough is essential for successful baking. Whether you choose to knead by hand or use a stand mixer, knowing the factors that affect gluten development, the ideal mixing techniques for different doughs, and how to troubleshoot common issues will empower you to create delicious homemade baked goods with confidence. With a stand mixer, you can enjoy the convenience, consistency, and efficiency it offers, making the kneading process a breeze and your baking endeavors a true joy. Happy baking!